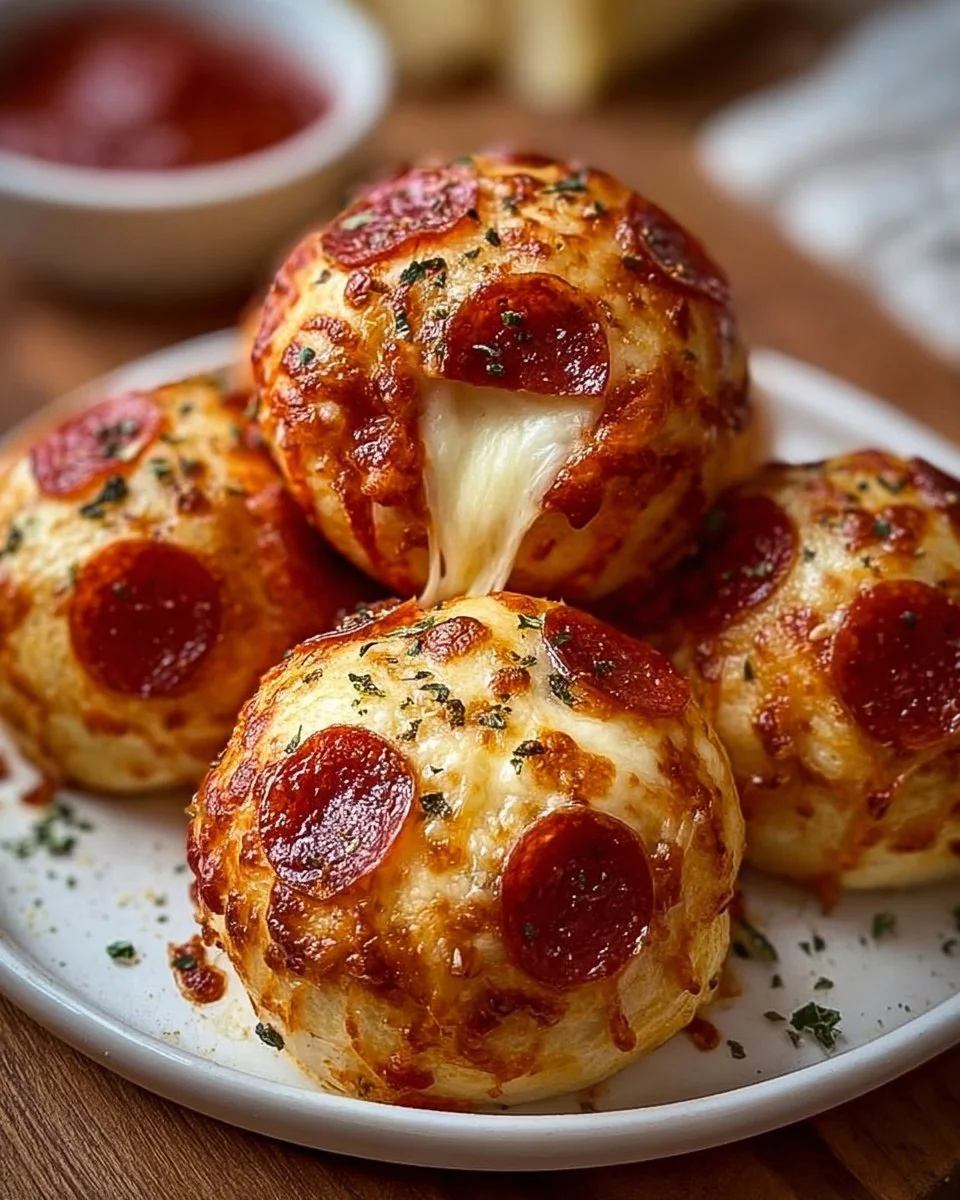
Imagine the tantalizing aroma wafting through your kitchen as you bake up a batch of Easy Pepperoni Pizza Bombs. As the golden crust turns a beautiful shade of brown, anticipation builds. Each bite promises a satisfying crunch followed by the gooey stretch of melting mozzarella, punctuated by the zesty kick of pepperoni. These delightful morsels beckon to family and friends, inviting everyone to gather around and share in the joy of homemade comfort food. With a simple mix of ingredients and an incredibly easy preparation method, you can create a snack that rivals any pizzeria’s finest offerings.
When you take that first bite, the explosion of flavors invites you into a world where pizza fantasy becomes delicious reality—crunchy on the outside yet warm and soft on the inside. The buttery garlic seasoning gives each bomb an extra layer of depth and richness that will leave your taste buds dancing. Pair these with a side of marinara dipping sauce, and every mouthful transforms into a feast of Italian delight. Whether you’re hosting a game-night gathering, a cozy family movie marathon, or simply indulging in a weekend treat, Easy Pepperoni Pizza Bombs turn any occasion into a memorable celebration.
Why You’ll Love This Easy Pepperoni Pizza Bombs
There are so many reasons to love these Easy Pepperoni Pizza Bombs. First and foremost, they bring the essence of a favorite pizza right into the palm of your hand. The crispy outer shell encases a gooey, cheesy center full of flavor, making each bite a delightful surprise. They serve as a fantastic finger food for parties, filling kids’ lunchboxes, or satisfying a midnight snack craving. The appeal lies not only in their deliciousness but also in their versatility; customize with your favorite toppings, dip them in sauce, or simply savor them as is.
What truly stands out is the simplicity of preparation. Even novice cooks can whip these up without a fuss, and in just a short span of time, the kitchen fills with warm, inviting aromas. Whether you want to satisfy a crowd or indulge in some self-care with a cozy treat, these pizza bombs are sure to please. Plus, who doesn’t love the fact that they’re baked or air-fried, making them a slightly lighter option than their deep-fried counterparts?
Preparation Phase & Tools to Use
To embark on your pizza-bomb-making adventure, gather a few essential tools. These will guarantee a smooth cooking experience and help you achieve pizza bomb perfection:
- Baking Sheet: This is your trusty companion for guiding those golden bombs to doughy greatness. Lining it with parchment paper simplifies cleanup and enhances crispiness.
- Small Bowl: You’ll need this for mixing your buttery seasoning blend. It ensures every bit of flavor is well-distributed.
- Rolling Pin (optional): While you can flatten the dough with your fingers, a rolling pin provides an even surface if you prefer that route.
- Oven or Air Fryer: Choose your method of cooking based on convenience—either way, you’ll end up with irresistible bites.
Practical preparation tips make the experience even more enjoyable:
- Set everything out before you start to streamline the process.
- Don’t hesitate to experiment with seasonings in the butter—perhaps a pinch of red pepper flakes for extra zing!
- Keep a close eye as they bake, as ovens can vary in temperature.
Ingredients for Easy Pepperoni Pizza Bombs
- 2 tablespoons melted butter
- 1 teaspoon garlic powder
- 1 teaspoon Italian seasoning
- 1 can (8 oz) refrigerated biscuit dough
- ¾ cup shredded mozzarella cheese
- ½ cup mini pepperoni slices
These ingredients blend together to create the heart of the bombs. The buttery mixture gets massaged into each bite, enhancing the overall experience. Feel free to experiment with substitutes—try using cheddar cheese instead of mozzarella for a sharper taste or swap out pepperoni for diced vegetables or different meats.
How to Make Easy Pepperoni Pizza Bombs
Step 1: Preheat and Prepare
Set your oven to 375°F, or if you’re leaning toward your air fryer, preheat it to 350°F. Line a baking sheet with parchment paper for easy cleanup and to enhance the crunchiness of the bombs.
Step 2: Mix the Topping
In a small bowl, combine the melted butter, garlic powder, and Italian seasoning. This buttery goodness elevates each bomb with its aromatic richness. Allow the mixture to sit while you prepare the next steps to let the flavors meld.
Step 3: Prep the Biscuits
Open the can of biscuit dough and gently separate the pieces. Using your fingers, flatten each round slightly. This simple step opens the door for the delicious fillings to find their cozy home.
Step 4: Add the Fillings
In the center of each dough round, place a small amount of shredded mozzarella cheese alongside a few mini pepperoni slices. The filling ratio is key; don’t overstuff, or you’ll face a delightful explosion instead of a neatly sealed bomb.
Step 5: Seal the Bombs
Carefully pinch the edges of the dough together to seal the filling inside. Form each piece gently into a ball, ensuring a tight seal; you don’t want any cheesy treasures escaping during the cook!
Step 6: Bake or Air Fry
Position the sealed dough balls seam-side down on the prepared baking sheet. Brush the tops with your seasoned butter mixture. Bake for 12-15 minutes, turning golden brown, or air fry for about 8 minutes until they puff up and exude warmth.
Step 7: Serve Hot
Allow your pizza bombs to cool for just a few minutes before diving in. Pair with marinara sauce or ranch dip, and get ready for a flavor explosion you won’t forget!
Chef’s Notes & Helpful Tips
- Make-Ahead Tips: Prepare the pizza bombs ahead of time, cover them tightly with plastic wrap, and store in the fridge. Pop them in the oven or air fryer for a quick heat-up before serving.
- Cooking Alternatives: If you prefer an air fryer, rejoice! You can achieve the same crispy and fluffy results without heating up your entire kitchen.
- Customization Ideas: Personalize your pizza bombs by adding sautéed mushrooms, bell peppers, or even a dollop of pesto for an unexpected twist.
Common Mistakes to Avoid
- Overstuffing: Avoid the temptation to fill them to the brim, as this leads to messy openings during baking. A moderate amount ensures a beautiful presentation.
- Sealing: Make sure each bomb is tightly sealed; gaps will let fillings ooze out, leaving a less-than-ideal outcome. Take your time here!
- Uneven Baking: Space the bombs at least an inch apart on the tray for even cooking and browning. Crowding can result in soggy bottoms.
What to Serve With Easy Pepperoni Pizza Bombs
These tasty treats stand on their own but shine even brighter when paired with complementary options. Here’s how to elevate your meal:
- Fresh Salad: A crisp Caesar or mixed greens salad balances the richness of the pizza bombs and adds freshness.
- Garlic Bread: A side of buttery garlic bread provides that ultimate Italian experience without competing for attention.
- Marinara Dipping Sauce: Enhance each bite with a robust marinara packed with herbs and spices.
- Ranch Dip: For an unexpected pairing, serve with ranch dressing; it adds a creamy, tangy twist.
- Veggie Platter: Crunchy vegetables with hummus round out the meal perfectly and add healthy options to the table.
- Cheesy Breadsticks: Pair with some ooey-gooey cheesy breadsticks for double the cheesy goodness.
- Stuffed Jalapeños: Kick things up a notch with spicy stuffed jalapeños that bring heat to your table.
Storage & Reheating Instructions
Store any leftovers in an airtight container in the fridge for up to 3 days. For longer storage, freeze the bombs individually on a baking sheet until firm, then transfer them to a freezer bag. Reheat in the oven at 350°F for about 10 minutes or gently fry in the microwave. Enjoy them warm for that fresh-out-of-the-oven flavor!
Estimated Nutrition Information
While these tasty pizza bombs can be a delicious treat, remember that nutrition will vary based on specific brands and quantities used. Approximately per serving (1 bomb):
- Calories: 150
- Fat: 8g
- Carbohydrates: 15g
- Protein: 5g
Disclaimer: Values are rough estimates and can vary.
FAQs
1. Can I use homemade dough instead?
Absolutely! You can substitute your favorite homemade pizza dough if you want an authentic touch. Just ensure it is flexible enough to form into bombs.
2. Are there vegetarian options?
Definitely! Swap out the pepperoni for roasted vegetables, mushrooms, or even olives. You can also enjoy a simple cheese bomb stuffed with a blend of your favorite cheeses.
3. How do I prevent the pizza bombs from getting soggy?
Properly sealing the bombs is crucial. Additionally, ensuring you don’t overstuff them will help maintain their structure and crunchiness throughout the cooking process.
4. Can I use any type of cheese?
While mozzarella is ideal for its melty texture, feel free to mix in cheddar, provolone, or any cheese of your choice for varied flavor profiles.
5. What dipping sauces pair well?
Classic marinara, ranch dressing, pesto, or even a spicy buffalo sauce would add a delightful twist to your pizza bombs.
Conclusion
Embrace the joy of homemade comfort food by whipping up Easy Pepperoni Pizza Bombs. The delightful crunch, melting cheese, and the warmth radiating from each bite create unforgettable moments shared among loved ones. So be prepared to experience the happiness that comes from digging into these scrumptious bombs, which are as inviting as they are delicious. Gather your ingredients, follow the steps, and let the aromas usher in a delightful culinary experience that calls out for seconds—and perhaps even thirds!
Print
Easy Pepperoni Pizza Bombs
- Prep Time: 15 minutes
- Cook Time: 15 minutes
- Total Time: 30 minutes
- Yield: 12 servings 1x
- Category: Snack
- Method: Baking
- Cuisine: Italian
- Diet: Vegetarian
Description
Delicious and crispy pepperoni pizza bombs filled with gooey mozzarella and seasoned butter, perfect for parties or a cozy snack.
Ingredients
- 2 tablespoons melted butter
- 1 teaspoon garlic powder
- 1 teaspoon Italian seasoning
- 1 can (8 oz) refrigerated biscuit dough
- ¾ cup shredded mozzarella cheese
- ½ cup mini pepperoni slices
Instructions
- Preheat the oven to 375°F or air fryer to 350°F, and line a baking sheet with parchment paper.
- Combine the melted butter, garlic powder, and Italian seasoning in a small bowl.
- Open the biscuit dough and flatten each round slightly.
- Place shredded mozzarella and mini pepperoni in the center of each dough round.
- Pinch the edges to seal each bomb tightly.
- Position the bombs seam-side down on the baking sheet, brush with seasoned butter.
- Bake for 12-15 minutes or air fry for about 8 minutes until golden brown.
- Cool for a few minutes and serve with marinara sauce or ranch dip.
Notes
Serve with marinara sauce or ranch for a delicious dip. Can be made ahead and refrigerated or frozen for later.
Nutrition
- Serving Size: 1 bomb
- Calories: 150
- Sugar: 1g
- Sodium: 300mg
- Fat: 8g
- Saturated Fat: 4g
- Unsaturated Fat: 2g
- Trans Fat: 0g
- Carbohydrates: 15g
- Fiber: 1g
- Protein: 5g
- Cholesterol: 20mg